My initial attempts at getting Labview to communicate with a DAQ were based on two methods. The first was an old pdf document from DATAQ and the second was from ultimaserial.com, without these two informative guides I would have been lost. Once I had a working virtual instrument in Labview, vi, I resort to what I did when I was learning to model in Matlab Simulink by playing with various things to see what effect they have. This is my most efficient way to learn new software like this, because by discovering for myself what something does means I can better understand how to use the tools to my advantage. There are of course hundreds of examples available in Labview for you to play with, so it looks like my summer is going to be busy playing with them too....
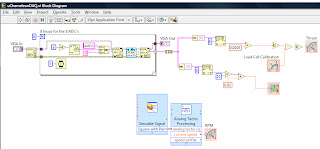
Here is a screenshot of my block diagram for the DATAQ 148 DAQ in case anybody ever needs that extra bit of help with their models, if anybody needs the entire vi for this DAQ then get in touch. This vi has an extra bit tacked in to it so I could see how well it was working when using a load cell which I use to measure thrust.
The front panel, the bit that will be the user interface once complete looks like this, the calibration dial is used to set the thrust gauge to zero before use, as strain gauges are very sensitive to small changes in temperature and even switching the power supply on and off can result in a small deviation from the previously zeroed condition. A careful look at the block diagrams will show that the output from the DAQ is multiplied by a small value to convert the signal to Newtons, the dial then subtracts a small value from this signal, which is then passed through a block which ensures that the output is always positive. Therefore by moving the dial, the needle will approach zero, and if the dial exceeds the zero value, the needle will bounce back up, preventing false calibrations.


No comments:
Post a Comment